Sunday, April 29, 2012

[diy] polo collar


 leather peter pan collar - inspiration

to make something almost similar, you will need:
1. a polo tee 
2. ribbons.
3. needle and thread.

in 3 super easy steps!

 step 1. cut out the collar of the polo tee.

 step 2. remove the labels. 

 grab your ribbons. here, i recycle the ribbons i cut out from the insides of a top. 
those they sew on for you to hang your clothes by. 

 step 3. sew the ribbon onto the collar. make sure its secure. 

done! wear it. or you can add some embellishments to the collar to give it a chic edge. 
eg. add some studs, or lace, or pearls. 


Saturday, April 28, 2012

collar necklace inspiration


[diy] purple, blue and white


to make this mini statement necklace. you will need:
1. buttons (as many as you may need, and of the colour combination that you would like)
2. threads (buy those used to make friendship bands)
3. super glue

 friendship band threads. 

step 1. choose your colour combination of the threads that you want to make the pleats later. 

 step 2. pick 1 thread and weave them through your buttons. 
make sure to tie a knot at the back of each button to secure them in place. 

 step 3. measure the length of the other threads that you want, and cut them.

 step 4. tie all the threads together with the one weaved into the buttons like this. 
this will help make your necklace less flimsy. 

 make sure to hide all the knots carefully behind the buttons. 

step 4. apply super glue between the buttons to fix them in place to secure the pattern of your necklace. 
if your super glue doesnt stick immediately, press your materials together for about a sec or 2, 
it should work. remember to glue the thread knot to the blue button. 

 step 5. next, pleat your threads on both sides. 
make a loop at the end of one of the pleats, and the a simple knot on the other. 
cut off the excess thread on the one with the loop, 
apply fabric glue or white glue to the ends to prevent them from undoing themselves. 
do not cut the excess thread on the other side. 

 step 6. get a spare button, thread the thread through, and back again to form a 'x'

 step 7. once you are done with the above step, you should end up like this. 
knot the free threads behind the button over the existing knot that was done to end the pleats. 

 step 8. you should end up like this.
if the excess threads are still too long, cut them shorter to your liking.  

 done! 


now for some fun, 
i have hired a new model for my diy stuff! 


 eeyore!
eeyore wearing the statement necklace. 

the back of the necklace. 


[fashion] colour blocking

 diy button necklace 
diy white shorts 

diy eco clutch bag

Friday, April 27, 2012

upgraded and moving forward


its almost 4 years since i started blogging. this is the 4th template that i have upgraded to. its my most favourite so far, simple and minimalist. 

i would like to say a big thank you to all those who have been reading my blog all these years, giving me really sweet comments about my posts and sorts. 

i have moved my blog's status from 'inside out, upside down', to 'create and inspire' in this latest version of my blog. if you dint know, the previous skin's 'create and inspire' was a came along. here, i have fully adopted this name for my blog. reason for this, well, i think its time for my blog to move on. 

i used to blog about my thoughts, and about life, now i have 2 new additions to my blog, diy and fashion. well i am pretty much new at these 2, so pardon me if they aren't as impressive as other fashion or fashion diy bloggers. the reason for this new addition, is the inspiration that came after reading too many fashion and fashion diy blogs. 

the fun about diy, is the joy of experimenting during the process of recreating, and the sense of achievement when you flaunt those diy clothes and accessories out. think it this way, the clothes that you wear, is diy-ed by other people. why do you dare wear what others made, but not yourself? 

and fashion, well it always interest. my belief in fashion, creating the fashionable or rather, presentable look, 
with affordable clothes. 

there are some changes to my blog, so let me help you, cbox is gone, so if you have any comments for me, 
please hit 'comment' at the bottom of each post. with this new template, you can now share my post on facebook or '+1' them or tweet them, you can also opt to be one of my 'followers'. 

if you like my post(s), please spread it around. 

thank you. 

xoxo author 

Thursday, April 26, 2012

[diy] flaunt those eco-bags

i'm sure you have eco-bags at home. 
and some of them look really really ugly, 
you rather keep them in the storeroom. 

maybe after reading this post, you might think twice. 

eco-clutch bag, you will need:
1. 2 eco bags of about the same size
2. paint (acrylic and fabric paints)
3. brushes. 
4. needle and threads
5. zipper
6. hair dryer. 

 step 1. cut off the straps of both bags. here i have cut them out. 
for this clutch, i want the grey eco bag to fit inside the black one,
because the grey one is smaller than the black one. 

 step 2. decide where you want the neon colour to show out, 
paint at least 2 coats of white acrylic paints. blow dry using hair dyer between coats. 
because this is a dark colour eco bag, and you want the neon colour to stand out.

 step 3. once you are done with the base coat, 
paint another 2 layers of your desired colour (fabric paint). 
likewise let dry between coats. 

 step 4. because i want the grey bag to be inside the black one, 
i turn both inside out, then i cut off the sides of the grey bag, 
so that it opens up as 1 big sheet. 

 step 5. i place the black bag (turned inside out) between the fold of the grey bag. 
i use needles to pin the bags together to secure them.

 step 6. using a pen and ruler, 
i draw a line to mark where i want to sew the bags together. 
do the same for the other side. 

 step 7. once you are done, trim off the excess fabric.
you should end up as shown in the photo. 

 step 8. you can sew your bag to the zipper while still inside out, 
or turn it out and sew the zipper on. 
either way, you should end up like the photo below. 


true colour of the clutch. 
i have 3 compartments here, you can add Velcro to close the other 2 compartments.

now you have a 'branded' clutch, with a little chic twist. 

[fashion] ali-baba

 you sure have seen wide-leg pants. 
they sell it at bugis street too. 
but because most of the time, they dont let you try them on. 
so i was too afraid to buy them. 

i was about to cut my alibaba pants and turn them into a skirt, 
when i thought, probably, i should get it a second try. 

so here it is. recreating the wide-leg trouser look with alibaba pants. 

 get your alibaba pants. 
here, there are ribbons at the ends at allows you to tie them 
to gather them together higher, to create an overall 'v' shape. 
looks ugly, seriously, i dont know why i even bought them. 

anyway, tie the ribbons like how i did here so it doesnt change the shape of the pants. 

next, wear a singlet and tuck them inside the pants, 
wear a waist belt over it to secure the pants in place, 
and there you have recreated the wide leg pants look. 

who knows its an alibaba pants?!?

[diy] ribbon necklace in teal

want something of your very own design?
here's my original design, no cheat and recreated from other people's idea. 


 to make you very own ribbon necklace, you will need:
1. ribbon (of the colour you like)
2. buttons (here i recycled mine from another top)
3. needle and thread. 
4. fabric glue. 


step 1. wear the ribbon over your neck, 
measure it at the level that you want your ribbon to be it. 
cut the ribbon slightly longer than intended. 
next, cut a shorter piece of ribbon that is long enough to make a loop of your desired length. 
likewise, cut slightly more than intended because you will have to overlap it. 

 step 2. wear the longer ribbon over your neck again, 
use your fingers to hold on to the point that you want your ribbon to overlap, 
sew a 'x' at that position, do it a few times until its secure. 
then, take the shorter ribbon, make a loop, 
and sew it to the longer piece of ribbon at the intersection point. (see photo). 
try to make your stitches as close together as possible. 

 step 3. once you have sewed everything together and its secure, 
sew your ribbon like this, 
and pull your thread to give it a nice crease. (see photo below)

 step 4. once you are satisfied with how the crease looks like, 
pull thread taut and sew a few times over to secure it in place. 
now here you see my little mistake, and it looks ugly with the thread peeking out. 

step 5. sew your buttons in the middle of the ribbon to cover up your mistake. 
and bam! you are almost done! 

once done, your ribbon should look like this. 

step 6. to make sure the ends of your ribbon doesnt run, 
apply some fabric glue to the ends. 
make sure you apply it carefully so that it doesnt show. 
do not use super glue for this, it will change the colour of your ribbon 
and your necklace will be ruined. 
drop a drop of super glue at the back of your ribbon where all your stitches are, to secure it. 
be careful when you do that, make sure it doesnt seep through.  

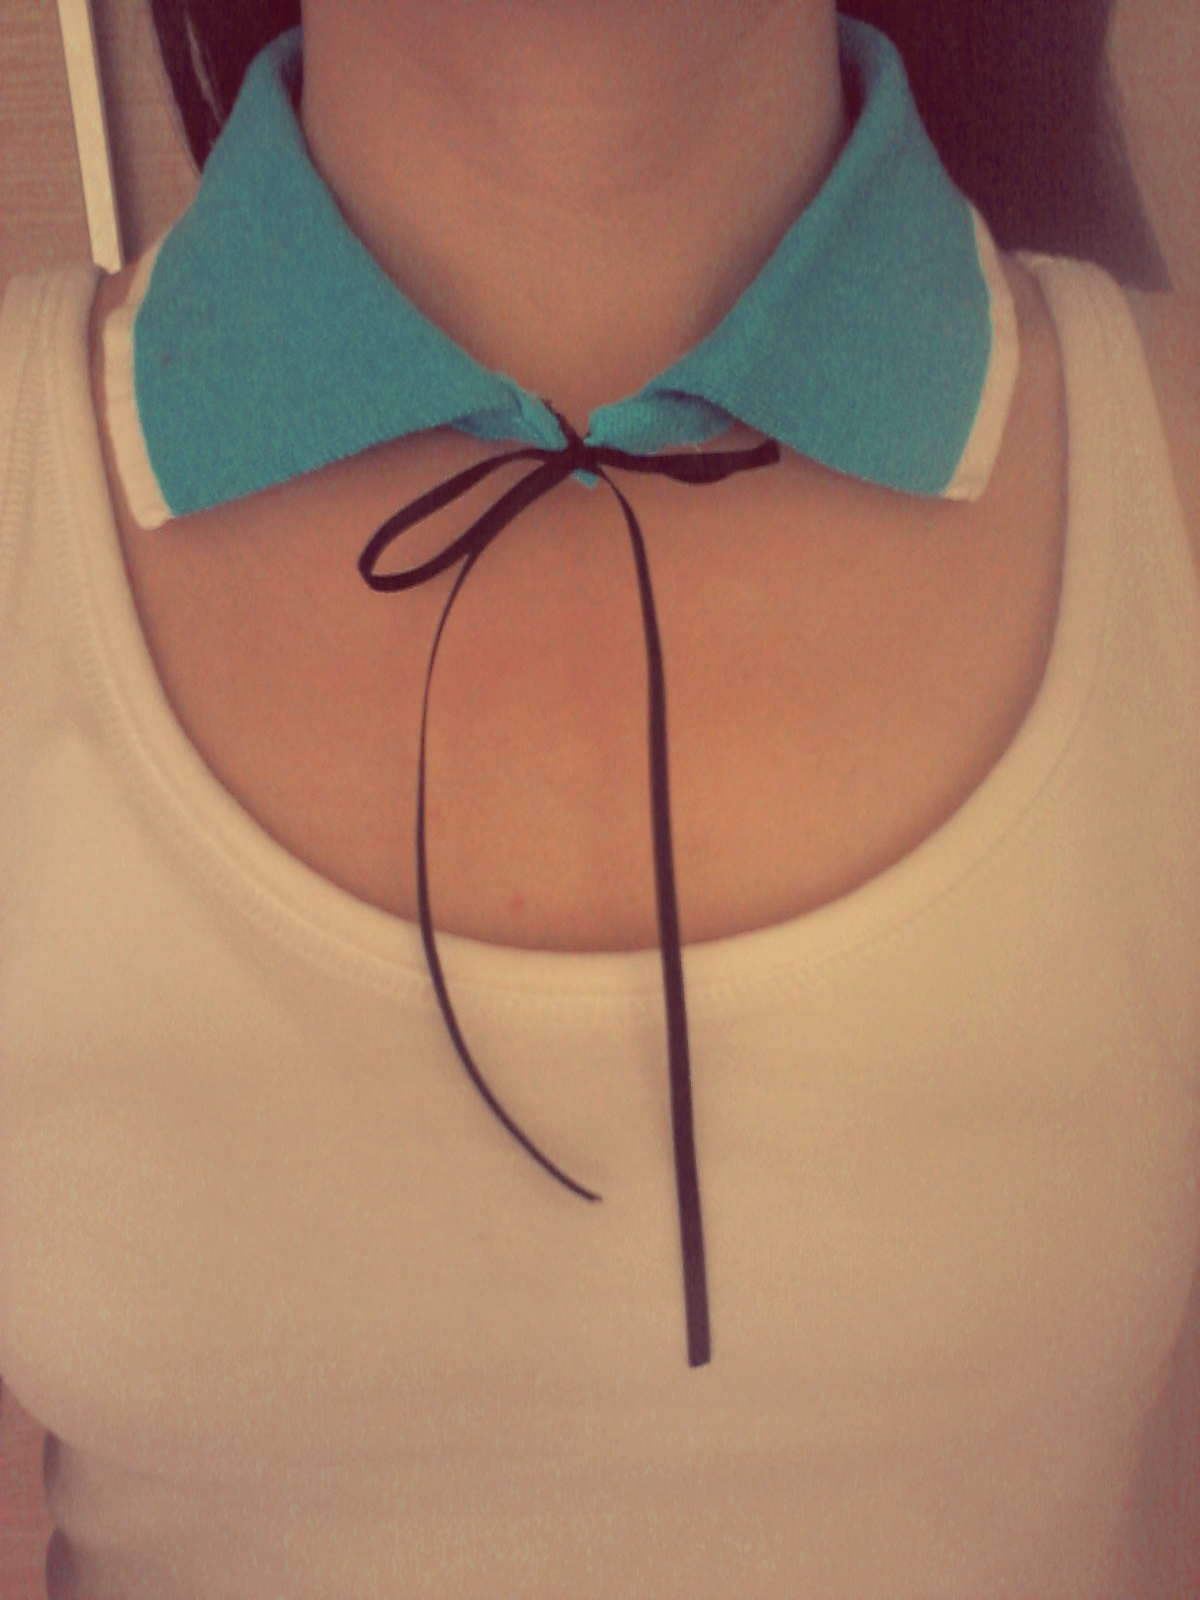
 now you have your very own necklace. 
you can wear it over a dark coloured top. 

 or a white top. 

i was so excited about my new clothes and necklace, 
i had to wear them out to test out their durability.  

here's a closer and better view. 


hope you like the share! 

[diy] button necklace

i never know buttons are such old fashioned stuff, 
it was so difficult to find a decent button. 

 i had no choice but to make do with this bottle of buttons from scrapalicious. 
expensive stuff. but thats the best i could find. 

 there is quite a range of colours to choose from. 
from rainbow ones, to lime themed ones, to simple black ones etc.

 my new necklace! 
i happen to wear the star necklace out, 
and so i topped it on, 
quite a cool combination. 

 neon's the latest fashion. 
i had to add something neon to my diy collection! 

 if you were wondering how i did the ends of my necklace, 
i closed/opened it with a mini safety pin. 
i dropped a drop of superglue to keep the threads in place and secure the knots.